
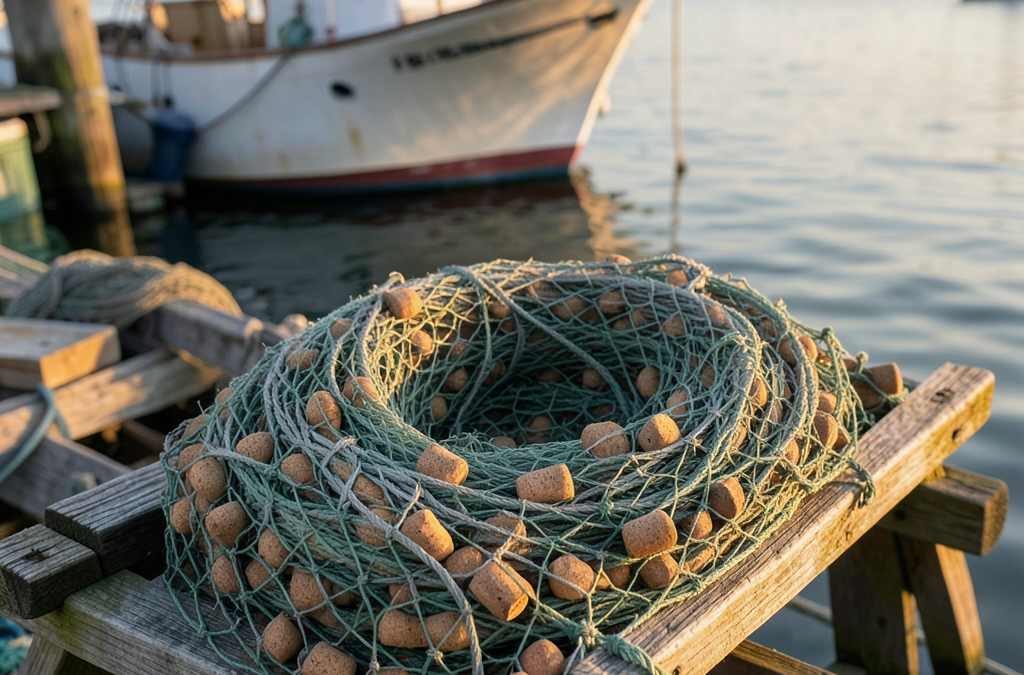
7 Top Tips for Maintaining Professional Fishing Nets
A professional fishing net is the last tool to touch the catch, and it takes more punishment than any rod or reel on board. Salt crystals grind between knots, ultraviolet light breaks down nylon and polyethylene fibres, and fish slime rots twine within days if it stays wet. These top tips for maintaining professional fishing nets turn that abuse cycle into a predictable routine that keeps mesh strong, flexible and selective season after season. Crews who follow one replace gear far less often, and a net that opens smoothly on the first haul of the morning is the direct result of an evening spent on care.
The problem most operators face is not ignorance of maintenance but timing. Care gets skipped during busy weeks, then rushed before the next trip — too late for salt already embedded in the twine. Damage between trips, on the dock or in a damp storage bin, is more common than damage while the net is working. Routine beats repair on both cost and downtime.
This guide walks through every stage of the cycle: daily rinsing, correct drying, deep cleaning, mesh repair, safe storage, mildew and UV prevention, and a seasonal checklist that ties the whole system together. Each stage lists the exact tools needed and the mistakes that shorten net life, so the routine can start tonight.
Why Maintaining Professional Fishing Nets Protects Your Catch and Budget
A net under load is a system of thousands of identical knots. When one weakens, its neighbours absorb the strain, so a failure looks sudden even though it built quietly over weeks. That is exactly where top tips for maintaining professional fishing nets earn their keep: inspection and cleaning catch the buildup while the fix costs minutes instead of days.
Once neglect sets in, the damage follows a pattern every experienced skipper recognises. Twine stiffens and loses flexibility, which changes selectivity because fish no longer mesh properly. Organic residue trapped in the folds feeds bacteria that weaken the fibre itself. Corroding hardware then saws through the adjacent lines it was supposed to hold. A net rarely fails from work; it fails from what happens between trips.
- Torn mesh causes escapement. Every hole lets legal-size fish through and costs income on each set until repaired.
- Weakened knots slip under load. A knot that has absorbed salt and grind loses grip, and slippage can open a whole panel.
- Stiff mesh lowers catch quality. Fish tangled in abraded twine arrive marked or damaged, which drops grade and price.
- Failure mid-haul. A net parting on the drum can drop the full catch, foul rollers and tear rigging in seconds.
- Replacement cost. Professional nets sit among the most expensive items in the gear shed, so a routine that extends service life pays for itself quickly.
Strong maintenance habits spread across an entire operation. A commercial crew that documents its step-by-step jigging outfit assembly for every skill level catches tackle faults before they cost fishing time, and the same log habit applied to net inspections does exactly the same job. Record inspection dates, repairs and hours of use, and aging gear announces itself instead of failing silently.
Daily Rinsing: Remove Salt and Debris Before It Cuts
Salt is the number one enemy between hauls. As seawater evaporates, sodium chloride crystallises into sharp grains that sit inside knots and against the twine, and every flex of the mesh drives them deeper like sandpaper. Crystals also hold moisture against the fibre, which keeps a net damp long after it has left the water.
The fix costs ten minutes at the end of every trip. Freshwater, low pressure, both faces of the net, with extra attention at the knots and where the leadline meets the mesh. Shake the net while rinsing so weed, shell fragments and debris fall free instead of drying trapped inside the folds. Ten minutes of freshwater at day’s end prevents most of the fibre damage that happens between trips.
- Use cool freshwater only. Hot water relaxes some synthetic fibres and can distort mesh size.
- Rinse both faces of the mesh. Salt hides on the side that faced the hull.
- Flush every knot. A knot is twine bent over twine, and it holds salt better than any straight span.
- Remove weed and shell debris by hand as you rinse. Anything left behind dries in place and becomes a cut point.
- Lift the net off the deck before rinsing. Water running through a net lying on scuppers washes grit straight back into the mesh.
Skip the pressure washer entirely. High pressure drives salt deeper into knots, frays fine monofilament and can tear aged mesh outright. A garden hose with the nozzle set to a wide, gentle spray does a cleaner job in less time.
How to Dry a Fishing Net Correctly Without Damaging the Mesh
A net left wet in a pile is a mildew incubator. Mould feeds on the slime and organic residue trapped in the folds, then colonises the fibre underneath, which is why mildewed twine turns weak and stained rather than merely smelly. Drying is not optional housekeeping; it is fibre protection.
Correct drying requires air on every surface. Shake the net hard, hang it spread out in shade with a breeze or fan moving through it, and separate overlapping panels so air reaches the middle folds. A net hung in a heap dries on the outside while the core stays damp for days, and that hidden centre is where decay starts.
Material changes the rules. Nylon and polyester tolerate sun better than monofilament, yet every synthetic loses strength under long ultraviolet exposure, and natural-fibre nets still used in some traditional fisheries must never dry in direct sun at all. Shade plus airflow works for all of them.
- Hang in shade with airflow. It reaches a fully dry net with far less UV damage than fast sun drying.
- Spread the mesh wide. Overlapping panels trap dampness and guarantee mildew at every fold line.
- Never pack a warm or half-dry net. A folded net with core dampness sweats inside the bag all night.
- Check floats and leadline separately. Water trapped inside hollow floats rots the attachment loops first.
- Confirm dryness before storage. The service-life gap between fully dry and almost dry is measured in seasons.
Finish with a bend test. Flex a section of twine between your fingers after drying: fibre that snaps instead of bending has already lost too much strength, so flag that panel for inspection before the next set.
Deep Cleaning a Fishing Net Step by Step
Rinsing removes salt, but slime, biofilm and odour need a proper wash. Frequency follows use: a charter or workboat net that lands fish every trip deserves a weekly wash, while a net used a few tides a month can go two to three weeks between cleans. Fish odour that survives a plain rinse is the signal to wash.
- Pre-soak the net in lukewarm freshwater for 15 to 30 minutes. This softens dried residue so cleaning lifts it instead of grinding it.
- Fill a tub or barrel with lukewarm water and add a mild, pH-neutral soap or a dedicated net cleaner. Never use bleach or chlorine-based products, which embrittle synthetic twine.
- Wash by hand. Push the mesh through the water with open palms and work a soft brush over soiled panels; stiff brushes and machine agitation distort mesh size.
- Treat stubborn odour with a diluted baking soda soak, or a short diluted white vinegar rinse for slime and mineral film, always followed by a full freshwater rinse.
- Rinse twice with clean water. Soap left inside the knots keeps drawing moisture and attracting dirt.
- Dry immediately using the shade-and-airflow method above. A clean wet net forgotten in a bin overnight undoes the whole job.
Check harbour rules before washing at the dock, since some ports restrict washing operations because net residue carries organic matter into the water column. A large tub on shore solves the problem and gives full control over product concentration and run-off.
Use cleaning time as a full inspection pass. While the net is soapy and in hand, run fingers along float lines, selvedge rope, splices and patches, and tag any weak spot for bench repair. Clean, flexible mesh catches better than dirty mesh even before it lasts longer.
Inspecting and Repairing Net Mesh Before Small Flaws Fail
Inspection runs top to bottom: floats, headline, mesh panels, footrope, leadline and bridles. Look for stretched or asymmetric mesh cells, bunched or discoloured twine, and any point where hardware rubs the net. Test questionable areas with a firm hand pull before deciding whether the net ships or stays at the bench. A ten-minute inspection after every trip prevents most in-season tear-downs.
The Basic Net Repair Kit
Keep the kit assembled and ready so repairs happen the same day the damage appears. A missing tool is the most common reason a small tear waits a week.
- Net needle and shuttle loaded with twine matched to the net’s original thickness and material.
- Mesh gauge sized to the net, used to hold each new cell at the correct opening while knotting.
- Sharp scissors or knife for trimming damaged elements cleanly before re-tying.
- Lighter or hot cutter to heat-seal ends of synthetic twine so tails do not fray.
- Protective gloves. Wet monofilament cuts hands easily under tension.
- Marking tags for flagging weak panels found on deck and finished at the bench later.
How to Close a Tear in the Mesh
- Stretch the damaged panel over the mesh gauge and count the broken bars to size the repair.
- Cut away hopeless twine above and below the tear so the repair starts from sound fibre.
- Re-tie the missing cells with the needle, matching the original knot style, so opening sizes stay identical to the surrounding net.
- Trim and heat-seal every new twine end. Loose tails snag fish and fray into fresh weak points.
- Pull the finished patch under hand load and confirm cell size and knot seating before the net returns to the water.
Knotless and monofilament nets repair differently from knotted twine: monofilament joins with interlocking loops and sleeves rather than tied knots, and a repair that mixes methods stiffens the mesh and shows fish the seam. Match material, gauge and construction exactly so the repair stays invisible in the water.
When Repair No Longer Pays
Retire a net when patches outnumber sound mesh, when twine fails the bend test across multiple panels, or when fibre shows the pale, chalky look of advanced UV embrittlement. Any repaired net must still pass a hand-pull test over its full surface before going back in service. Hardware deserves the same judgment: corroded rings, shackles and hooks drag the whole system down, which is precisely why choosing quality corrosion-resistant treble hooks and fittings matters as much as the mesh itself.
Top Tips for Storing Professional Fishing Nets the Right Way
Storage kills more professional nets than fishing does. A damp, folded net sealed in a bin, or a net hung in a sunlit corner of the shed, stacks every damaging factor at once: trapped moisture, no airflow, heat and light. Good storage costs nothing beyond organisation.
| Storage Method | Best For | Advantages | Watch Out For |
|---|---|---|---|
| Hanging rack | Long-term off-season storage | Full airflow, no fold lines, easy inspection | Keep clear of windows and direct UV light |
| Breathable mesh bag | Between-trip storage and transport | Portable, ventilated, protects from snags | Bag must stay dry; check odour before packing |
| Net reel or drum | Trawl and purse gear | Holds working shape, fast deployment | Drum surface must stay smooth; fit a sun cover |
| Ventilated plastic tub | Small hand nets and spare parts | Pest protection, stackable | Drill vent holes; a sealed tub traps damp instantly |
Whatever the method, room rules stay constant: cool, dark, dry and pest free. Never store a net directly on concrete, which holds damp and feeds moisture into the lowest folds. Keep nets away from fuel, oils and solvents, since petroleum products attack synthetic fibre, and remember that rodents and insects are drawn to fish residue in a dirty net, so cleanliness doubles as pest control.
For a wider view of how nets, floats and the rest of the gear room fit together, this complete guide to essential fishing equipment, floats and net gear covers the accessories and sustainable practices that pair directly with the storage rules above. Matching floats and net systems at the stored-in stage catches worn loops and mismatched buoyancy before they fail at sea.
The single most valuable storage rule is total dryness before packing; every other rule builds on it.
Preventing Mildew, UV Damage and Fibre Rot
Three threats drive most long-term net decay, and all three are controllable. Mildew needs moisture plus organic residue, UV needs light, and rot in natural fibres needs damp and dirt. Each threat has a short, specific prevention habit far cheaper than any cure.
- Dry fully in shade before every storage. This one habit starves mildew of the moisture it needs.
- Wash off fish slime promptly. Slime feeds bacteria and mould, and it holds water against the twine.
- Store away from windows and skylights. UV travels deep enough into a shed to embrittle twine hanging in its path.
- Choose UV-stabilised twine for replacement panels. Modern stabilized nylon and polyester hold strength noticeably longer in surface fisheries.
- Rotate stock on nets kept in service. Give each net dark rest periods so UV load spreads across the fleet instead of wearing out one net.
Learn the warning signs so prevention can act early. Mildew announces itself as black or grey spotting with a musty smell while the net still works. UV embrittlement shows as pale, chalky fibre that snaps with a clean break instead of a fibrous tear. Either sign means shorten the care interval, not merely patch the damage.
For heavily used surface gear, some crews apply dedicated net preservatives or protective dips between seasons. Follow product directions exactly, because a preservative formulated for knotted nylon can harm monofilament mesh. The wrong product is worse than none, since it can soften the fibre and accelerate wear.
Top Tips for Maintaining Professional Fishing Nets: Final Checklist
The whole system reduces to one cycle: rinse today, dry correctly tonight, inspect after every trip, wash weekly, repair at the bench, and store dry, dark and pest free. Each of these top tips for maintaining professional fishing nets costs minutes, and together they decide whether a net serves for seasons or folds early.
- After every trip: freshwater rinse, debris removal, quick inspection, hang to dry in shade.
- Weekly in season: full wash, knot and hardware check, patch small tears the same day.
- Monthly: gauge check on repaired cells, bend test on working areas, float and leadline attachment check.
- End of season: deep clean, full repair pass, preservative where appropriate, complete drying, store on a rack or in a ventilated container away from light.
Gear that is cared for repays it on deck: smoother sets, fewer mid-haul surprises, catch presented in better condition, and replacement costs pushed seasons into the future. Maintenance is not spare-time work; it is part of fishing itself.
Start tonight. Rinse the working net, hang it spread in the shade, and walk the mesh with your hands. Then pin the seasonal checklist above where the crew can see it, and keep the linked rigging and equipment guides close by — a well-kept net, a well-rigged outfit and durable hardware form one system, and that system is only as strong as its least maintained part.